Click on the pictures for descriptions and links!


Throughout my Grade 8 year I learned several new things about technology I hadn't known before.
|
QR code for Advertisement OneNote Assignment
|
|
hyperbole identification assignment: (practice)
The advertisement "Frosted Flakes Tony the Tiger" used hyperbole twice. The first time the literary device hyperbole was used was when the narrator of the commercial said "frosted flakes cereal can help bring out the tiger in you!" this was an extreme exaggeration because frosted flakes cannot be or bring out the tiger in you. The second time hyperbole was displayed was when the tiger transformed into a armored tiger. This was completely exaggerated because after eating frosted flakes cereal it is not possible to become armored and strong in such high measures. Although the real message behind this exaggeration was that you can become super strong LIKE a tiger, etc. The reason why they used this hyperbole is to show that when you eat their cereal you get strong/powerful and energetic LIKE a tiger, and the energy spills out of you when you eat their cereal.
Above is my very first Powtoon on an amazing book called Crossed by Ally Condie!
Below is also my second Powtoon on a commercial for the best known shoe company called, "Nike" :
Below is also my second Powtoon on a commercial for the best known shoe company called, "Nike" :
This year, I also learned how to make a website! See my very first website by clicking the link below!
http://sheza801practice.weebly.com
http://sheza801practice.weebly.com
photoshop assignment: a photoshopped chalk art!
Here is a description of how i did it and how my group helped my art be possible.
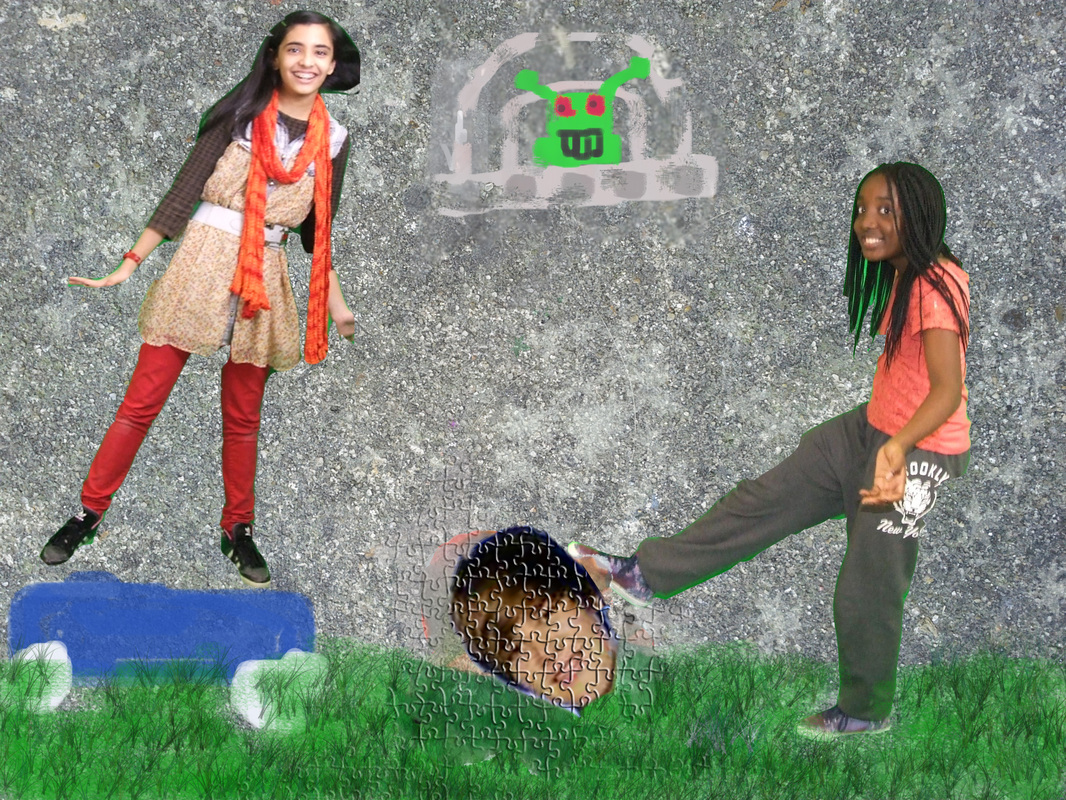
My group did a scene that incorporated all of our ideas. The scene turned out to be creative, unique and interesting. To make the art come alive my group decided that we would use lines to show sound and movement. We showed that I was skateboarding in a funny way and my friend was stepping on Justin Beiber's head. For more randomness we put in a UFO with a green alien in it. The foreground was grass while of course the background was concrete. My group decided that we would do the same picture but still put a little creativity into each of ours to make each one unique in its own way.
My photo-shopped chalk art was created using the program Adobe Photoshop utilities and pictures that were taken in front of the green screen. The tools I used were the magnetic lasso tool, the brush tool, the move tool, layers, styles, spot healing brush, the history button, the sponge tool, the pixel changer, opacity changer, flow changer, swatches tool, colour tool, the eraser tool and transform option . I used the magnetic lasso tool to cut out my photos that were taken in front of the green screen. After I cut out my three figures (2 group members and myself) I used the move tool to place my cut out onto the concrete that i had copied from google images. To copy the concrete onto the Adobe Photoshop I first went on google images and wrote "asphalt". After I picked the best suited asphalt photo I could find. I copied the chosen photo then went back to Adobe Photoshop and clicked the tab "File". From there I clicked "New" and "Image from clipboard". Now that my background was copied I used the "move tool" to drag my cut out green screen photos onto my asphalt background. Since the photos taken weren't exactly fit into my asphalt background I went to edit, transform, then scale to change the size of my photos. Now that I had all my items in place I started doing the real art. To do this I went to the brush tool and picked a brush that looked like chalk, which was the "48 pixel oil heavy flow dry edges" effect. After picking my main brush I began to make the UFO with the alien in it. To make things easier for myself I put the opacity for my brush to 100%. This made my chalk look more like marker, but this was only temporary. First, I made the UFO with white and then changed my colour to green for my alien. To do this, I went onto colour on the right side options, then clicked the suited shade of green, I did the same throughout all colour switches. After making my UFO I had to make it look like it was made of chalk not marker. So, I first clicked the layer that my UFO was on, then I went to the eraser tool and clicked the "100 pixel white round bristle" effect for my eraser. Then I put the strength to about 33%. I started to constantly click on top of my UFO drawing. Slowly the marker effect turned into a blurry, rigid chalky effect. After I was done with the UFO I continued my drawing by making the grass. To make the grass have a chalky effect but still have some dimension in the grass I went to brush tool and selected the "134 pixel grass" effect. I made the opacity 43% and dragged my mouse around creating the foreground of grass. Now, my grass had dimension that grass has, and looked like chalk was used to make it. The last step to completing my art was to put in Justin Beiber's head under my friends foot to make it look like she was going to step on his head. To do this I took a picture of Justin Beiber from Google Images and used the magnetic lasso tool to cut his head out of the picture, then using the move tool I dragged it to the layer that had my art in. I put Justin Beiber's head under my friends feet and then to make Justin look a little more chalky I went to styles and clicked the "puzzle" style. My picture was complete.
My collaboration skills helped me make this a great piece of art because I shared my ideas and listened to others. Combining ideas created a unique and interesting scene. If I hadnt accepted others ideas and given my own, my art wouldn’t have been possible.
HERE IS THE ACTUAL ART!: